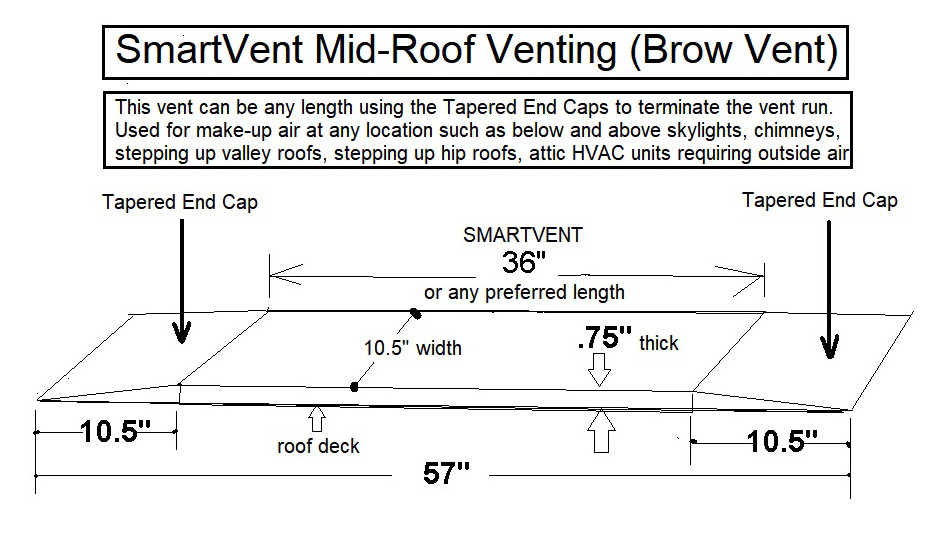
SmartVent Tapered End Caps are 10.5″ square tapered ventilation pieces that seamlessly blend with US RoofVent & Smartvent to give the roof a more aesthetic and clean finish to your intake ventilation project.
Sale!

SmartVent Tapered End Cap
Original price was: $8.95.$6.95Current price is: $6.95.
Interested in receiving more information and a sample?
Description
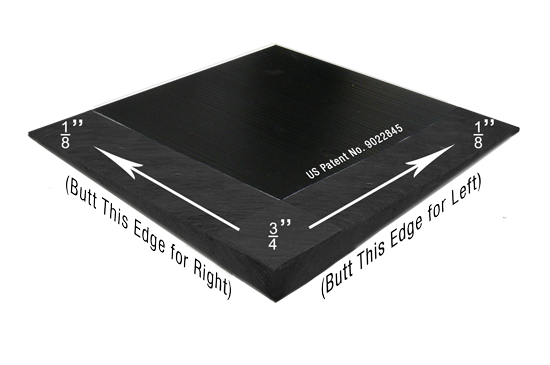
 The patented SmartVent Tapered End Cap can be installed Right Side or Left Side, as you begin your US RoofVent & SmartVent run or end the run. Designed with the contractor in mind, this easy to install end cap makes working with US RoofVent & SmartVent simple and cost effective. Use it to end a run near a dormer, valley, hip, chimney or skylight.
The SmartVent Tapered End Cap ‘tapers’ the US RoofVent & SmartVent back down to the roof. All that you need to do is nail it down to the roof. Period! The fabric is already attached at the factory for right hand or left hand installations.
Patent numbers 6,212,833 ,9,022,845 & 6,447,392 issued by the United States Patent & Trademark Office.
Installation instructions below or Download the PDF by clicking here
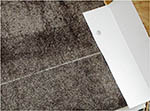
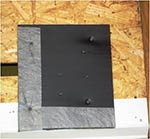 Step 1– Ensure the 1” roof cutout was completed to 12” before the end of the run and the metal drip edge was previously installed. Nail the SmartVent Tapered End Cap as shown with the bottom edge flush with the drip edge. Leave about 3” to 6” of roof deck showing from the wall. Nail at all four corners using nails that penetrate through the roof sheathing.
Step 2– Butt the US RoofVent or SmartVent section against the SmartVent Tapered End Cap tightly and nail per your vent directions.
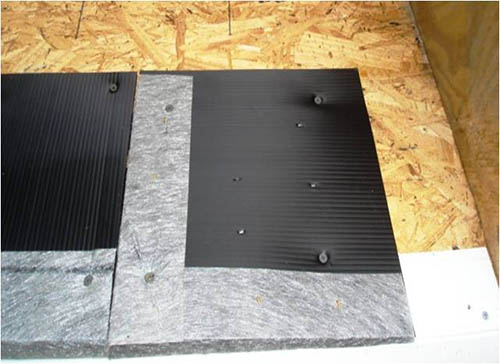
Step 3– Continue installing the remaining US RoofVent or SmartVent over the roof deck sheathing and previously installed drip edge.
Step 4– Install 36” wide ice shield only over the US RoofVent or SmartVent and SmartVent Tapered End Cap tight against side wall and continuously across the roof. Keep 36” ice shield flush to the SV lift edge which will cover the entire top surface of the vent.
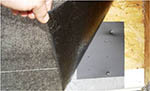
Step 5– Ensure the ice shield is only over the vent and tight against the wall for eave edge installations.
Step 6– Install wall step flashing over ice shield and up the wall. Allow a ½” to 1” eave edge overhang for shingles. Ensure step flashing is installed at each shingle course.
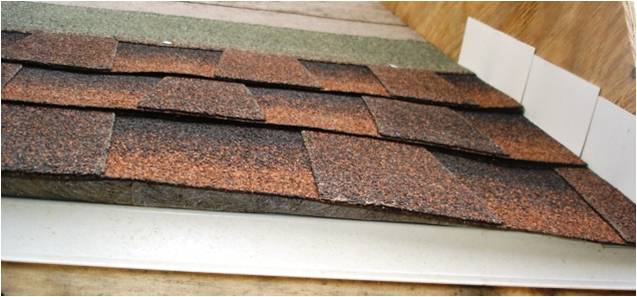
Step 7– Install starter course and shingles with a ½” to 1” overhang beyond the lift edge of the US RoofVent or SmartVent. Ensure step flashing is installed at each course with the proper coverage.
Step 8– Continue installing tar paper and shingles up the roof with step flashing. The SmartVent Tapered End Cap slopes the shingles down to the level of the wall flashing as shown.
Note: When using the SmartVent Tapered End Cap on a mid-roof application, leave about a 12” space between hips and valleys so not to interfere with the flashing or cap shingles installation.
Using the SmartVent Tapered End Cap should be easy and effective. Always ensure ice shield installs over the vent and carries at least 12” beyond the end when possible.
Additional information
| Weight | N/A |
|---|---|
| Dimensions | N/A |
| Piece(s) | 1, 2, 3, 4, 5, 6, 7, 8, 9, 10, 11, 12 |